Clay Plaster How-To
pictures by Travis Toon
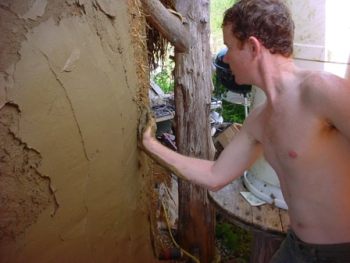
Earth plaster can be used as a finish layer on cob, straw bales, earthbags, and other natural building techniques. This document describes finish earth plaster on cob, but the process is the same on other materials. Variation in materials and technique is possible and often desirable to account for local conditions or to try new things.
When sufficient irregularity is present (holes deeper than an inch and a half or so), a base layer should be used. A base layer of natural earth plaster can be made with the same basic technique but using chopped straw rather than cattail fluff for fiber. Cob can also be used as a base layer. Natural plaster is similar to cob, but adds manure and wheat paste for better adhesion, strength, and smoothness. For exterior applications, lime is often added for increased water resistance, but straight lime plaster is a different process.
Starting from sifted materials one person might take between twenty and thirty minutes to stomp a batch of plaster. Preparing the materials may add another hour to hour and a half per batch, with each batch covering about eighty square feet.
Making Finish Earth Plaster involves the following steps:
- Sift sand using a window screen
- Spread tarps on ground
- Dump fifteen gallons of sifted sand onto tarp
- Fill two or three five-gallon buckets with clay
- Use hole hog with paint paddle to mix water into clay buckets
- Sift seven gallons of frothy clay through 1/8″ hardware cloth (screen) onto the tarp
- Stomp and roll until homogenous
- Add two gallons cooked wheat flour
- Add one gallon aged cow manure
- Stomp and roll until homogenous
- Add a half gallon of cattail fluff
- Optional: add self essence to the mix
- Stomp and roll until homogenous
Using Earthen Plaster
- Pre-soak the work area 30 to 90 minutes ahead
- Re-wet a small working area
- Smear on plaster with hand or a trowel
- Smooth plaster with trowel
- Polish the plaster
Sift sand using a window screen [top]
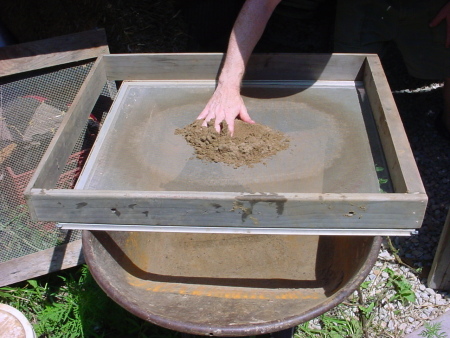
This is the single most time consuming step of the process and can be done in advance when large work parties are not available. If the sand is wet, it may be more efficient to sift through 1/8″ hardware cloth before the window screen. A trick that works well to get dry sand is to skim off a half inch of sand from the pile, allowing the next layer to dry while sifting. It will take forty-five minutes to an hour to sift the fifteen gallons needed for one batch of plaster that will cover up to 80 square feet.
Spread tarps on ground [top]
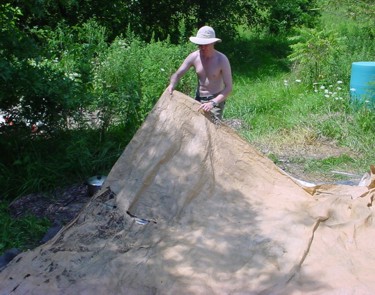
A hole in the tarp can allow rocks to come through, undoing to some extent the work that went into sifting the sand and clay. 8’x8′ is about the right size; much larger than that makes it more difficult to lift the edges to roll. We get used lumber tarps from Memphis Lumber and Hopkins Lumber. Get extra; they can take quite a bit of abuse.
Dump three five-gallon buckets of sifted sand onto tarp [top]

We get our buckets from a guy who sells used food-grade buckets at the Rutledge Dog and Gun flea market for $1 each. He even delivers to Dancing Rabbit (about four miles from the Dog & Gun), and sometimes we purchase his whole truck full of buckets and barrels!
Fill two or three five-gallon buckets with clay [top]
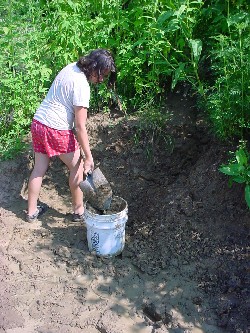
The clay at DR is mostly montmorillonite, a highly expansive clay. We don’t know how much the type of clay affects cracking, however cracks will appear if an insufficient amount of sand is used or if the mixture is too wet.
Use hole hawg with paint paddle to mix water into clay buckets [top]

The clay is ready when you can put your hand in it and take it out and not leave a hand print. This is both to make it possible to sift the clay and to provide the right consistency of the final product. This does not take much time.
Sift seven gallons of frothy clay through 1/8″ hardware cloth onto the tarp [top]

Hardware cloth is a metal screen. Sifting removes rocks and sticks that make it impossible to smooth the plaster as it is applied. This is a critical step, and takes about ten minutes.
Stomp and roll until homogenous [top]

Stomp with bare feet and lift edges of the tarp to roll. Rolling frequently helps to get a good mix.
Add two gallons cooked wheat flour [top]

Cook the wheat flour in a gallon pot. Start the water heating and while still cool whisk in three cups flour, stirring constantly until it thickens. White flour works best because the bran may cause mold spotting on the wall. Wheat paste can sour if the plaster isn’t used quickly enough, creating olfactory challenges beyond those of the other ingredients. This just means don’t mix the wheat paste in and then leave it for multiple days before applying.
Add one gallon cow manure [top]
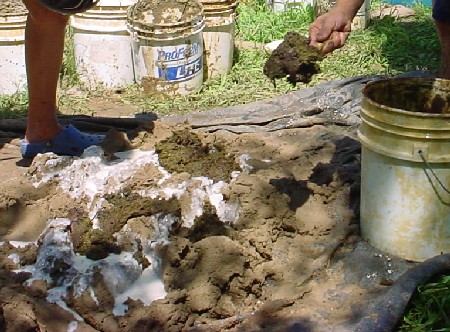
The manure can be used fresh or aged in a sealed container to retain moisture. Manure has small fibers and natural enzymes that add considerable strength. The smell of the manure disappears almost completely when dry.
Add a half gallon of cattail fluff [top]

The cattail fibers are similar in function to the straw used in cob, but allow a smoother surface with uniform adhesion. Cattails are a good source of small, separated fibers (by ronni here). Harvest in August or September and as they dry they will burst open in fluff. The fluff usually comes right off, but if it hangs together in clumps it can save time in the stomping stage to first fluff it with a weed eater in a bucket or barrel, covering most of the barrel with canvas as you work.
Optional: add self essence to the mix [top]
Earth plaster is a labor intensive process; feel the love you are adding to the final result and enjoy the process. If you want, let some of your spirit go into the plaster.
Stomp and roll until homogenous [top]
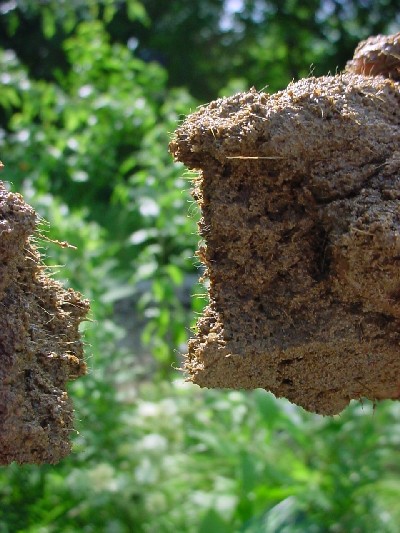
Particularly note the uniform distribution of fibers. Once it looks done, stop.
Using the finish plaster
Pre-soak the work area 30 to 90 minutes ahead [top]
Do not skip or skimp this step! The key to good adhesion between plaster and cob is making the cob wet when applying the plaster. It takes some time for the water to soak in enough to be effective. Dripping water is less useful, but otherwise the wetter the better. Wet a large area during this step.
Re-wet a small working area [top]

Now that the water has soaked in it is important to rewet the surface immediately before applying the plaster. Wet small areas at a time that you can plaster in ten minutes.
Smear on plaster with hand or a trowel [top]
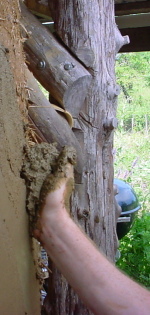
Using hands at this stage may reduce cracking. Aim for 3/8″ to 1/2″, or whatever depth is necessary to smooth the wall or achieve the desired effect. Consider filling holes deeper than an inch and a half with cob rather than plaster. One technique that works well is to wet some plaster more than usual and apply a 1/8″ layer first. Then apply a second layer, also by hand, to the desired depth.
Smooth plaster with trowel [top]
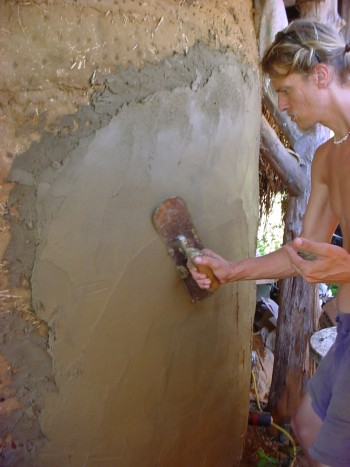
Troweling a couple of feet in a single stroke minimizes boundary lines and provide the smoothest result. Aim for broad, even strokes. It may first be necessary to first add additional plaster to low spots with the trowel and do smaller area troweling.
Polish the plaster [top]
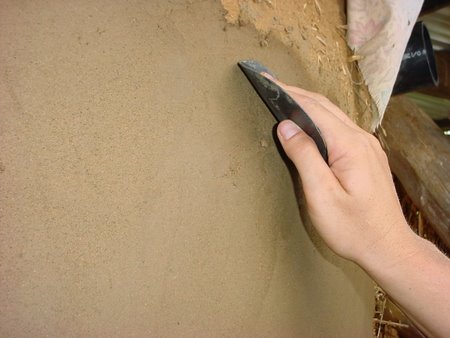
After the plaster has dried for a few hours, we use a plastic disc to remove the remaining small ridges and to further smooth the surface (burnishing). The plaster should be stiff but not dry to do this step correctly. For general smoothing, move the pad in a circular motion. You may need to perform this step several times as the plaster dries, but stop when it looks finished because you can overburnish. This step aligns the fibers in the plaster and provides the smoothest possible finish.
You Can Do Natural Building With Us
Dancing Rabbit is a great place to do natural building. Visitors and interns can get hands on experience and we hope to have more natural building workshops in the future. If you already have experience with natural building, we’d love for you to build your home here at DR and share your skills with us as we share ours with you. Plus we have many paid work opportunities for those with building skills from those in the village who want help building a home.
If you are interested in natural building at Dancing Rabbit, then join us!
